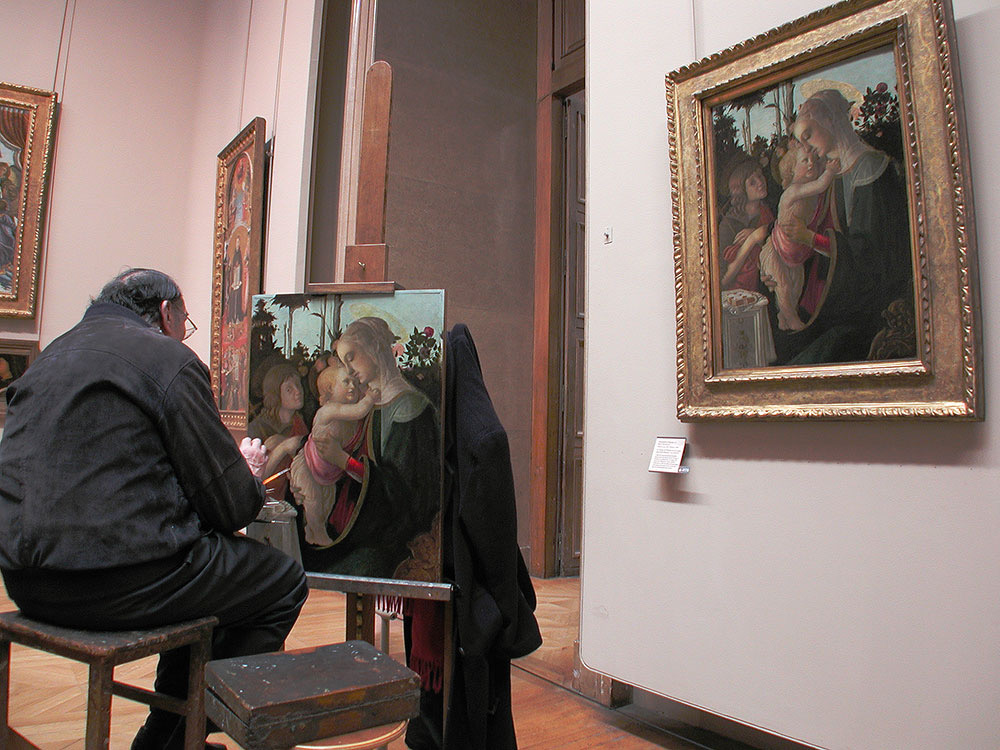
This question comes up again and again in the form “how do I make my images look like this?” or “where was this taken?” or “how do I get these colors/saturation/contrast?”
Before I answer the headline question, though, there’s another question you should ask yourself first: what’s your motivation?

If you’ve ever been to a big museum like the Louvre, you’ll have encountered the easels of painters who are trying to slavishly copy a painting hanging on the wall. In the art world, there’s a method of teaching that involves learning how a “master” did what they did. That’s not just about composition, but more importantly about brush strokes, layering, blending, and a whole bunch more technique-related bits. The thought is that if you can reasonably recreate an image, that implies that you understand how it was created.
If your motivation is that—you want to understand how a photo was created—my answer to the headline would be yes, that’s probably a valid approach to learning. However, a “copy” shouldn’t be your end goal, it should be an intermediary step. Understanding how something was done is different than understanding how to do something for yourself.
Galen Rowell taught me that.
He spent a lot of time researching any place he was going to photograph, and he often brought sample photos with him on trips. He’d use those to judge where someone had actually placed their tripod and consider why they might have chosen the lens, aperture, and focus point they did. He also loved historical photos: he wanted to see what something looked like today versus the way it did when it was originally photographed.
But that was more about historical photo education and scouting for him. The photos Galen took in those locations were unique to him: he Galenized the place. Which often meant that after seeing what someone else did, he climbed something, looked at it from another angle, or used a completely different—typically 20mm f/11—set of gear.
He also used three other things he learned from studying other photos and photographers along the way: contrast reduction via (1) graduated NDs or (2) fill flash, and (3) near/middle/far relationships. With graduated NDs he even went so far as to decide that the ones that existed all did the wrong thing, so he worked with Singh-Ray to create new ones that did what he needed done. Fill flash was another of those “I learned this…I’m going to do that” things in Galen’s training. Once he understood how everyone else was using flash for fill, he figured out how to make fill work the way he wanted it to. That certainly wasn’t the way Nikon designed the Speedlights to work.
The near/middle/far thing came essentially from study of the Muench’s, though once again Galen adapted it differently. Indeed, the “middle” was often Galen! Why? Because the Muench version didn’t show scale. A human in the image shows scale.
Most of the time, you knew an image was Galen’s on first sight. That doesn’t happen because he was imitating someone, it happens because he studied what others did and then used that information as a foundation for what he wanted to show.
One of the last challenges Galen hit me with was “how was I Thoming a photo?” I never got to give him a clear answer before his untimely death, though I had planned to give him my answer the next time I saw him. My understanding myself after first understanding what others were doing generated a whole new way of teaching, as well as a book I’m still trying to lock in some final details on before publishing.
But this article’s headline is targeted at you. Your answer should be: yes, it can be productive to imitate so that you can understand how a great photographer got to his image in the first place. But that was their image, not yours. Almost certainly you would have had a different response to a place, setting, subject than the photographer you learned to imitate. So can you capture that? Can you make a photograph your own?
When you can, that’s when you know that you’ve done what Susan Sontag once suggested: stand on the shoulders of those that came before you.
