For those thinking about getting to Africa from the US for wildlife photography, it works basically like this:
- For Eastern Africa (Kenya, Tanzania) you typically fly to Europe and then fly down to Nairobi (Kenya) or Arusha (Tanzania).
- For Southern Africa (Botswana, Namibia, South Africa, Zambia) you can fly from Atlanta to Johannesburg (Delta) or from Washington DC/New York City to Johannesburg (South African Airways/United). Or you can fly to Europe and then to Johannesburg from there. From Johannesburg you can get to pretty much anywhere in the Southern Africa area with ease.
I’m on the “thru Europe plan” this trip, mainly because United offered me a really great deal flying business class all the way. But be aware that this adds a day to the effective transit time. Normally I fly from DC to Johannesburg and I leave early one evening and arrive the next. I can go from DC to Maun in about 30 (constant time zone) hours, and that’s spending the night in Jo-berg at a hotel.
Through Europe you typically leave the US in the Evening, arrive in Europe in the next morning, then leave Europe in the evening and arrive in Jo-berg the following morning. In constant time zone hours I end up somewhere near 48 (constant time zone) hours in transit (and this still includes a night in Jo-berg). Also, be careful which airport/town you decide to spend your European day in. Some airports are easy to get out and do something else from, others are an expensive and longish trip from downtown and areas of attraction, so don’t lend themselves well to that.
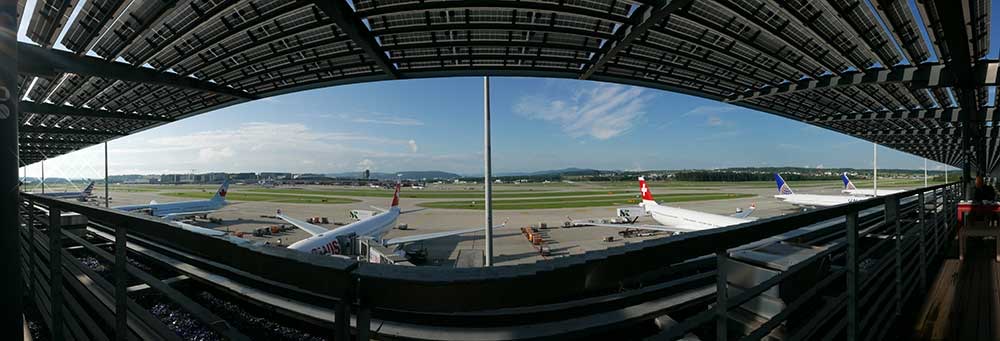
This year I’m trying Zurich, which turns out to be a pretty nice airport, especially if you have access to the lounges. This is the view from the lounge terrace this morning as I got in. That’s the plane I came in on at the far right, so I didn’t even have to walk far.

This particular Star Alliance club is pretty darned good: no adapters needed for most power plugs, a chef on duty cooking meals on demand, an ice cream bar, self-serve beverages including Starbucks-type coffee variations I don’t partake of, a quiet area where you can catch a nap on one of the lounges, and, of course, the nice open air terrace I’m taking advantage of this morning as I write this.

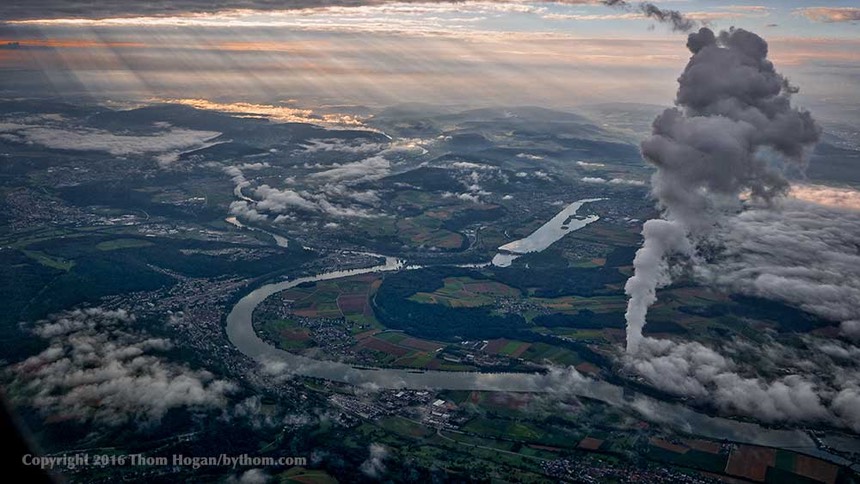
Taking photos from the terrace was a snap (pardon the pun). Taking photos while flying is always a battle. The above is what I woke up to as we were heading down into Zurich.
You can do a few things to help yourself out here. First, wear dark (black) clothing so your reflections don’t show up in the window. Second, turn off as much of the lighting as you can. Preferably sit on the sunny side of the plane, as if you sit on the shade side you’ll get the brightness from the other side of the plain putting glare on your window. Better still, invest in a LenSkirt and use it to shield the light from the window [advertiser link, below].
Unfortunately, using a LenSkirt puts you up against another problem: vibration. The temptation is to stick the camera up against the glass (you’re handling the camera through a small opening, so you’re looking for stability). That’s not good. You don’t want to transfer any vibrations to the camera, which means you really want to use good hand holding practice away from the window. You don’t even want to brace your body against the plane’s exterior if you can, because you’ll transfer vibrations/bounces. Vibration reduction helps, but it’s a band aid, not a solution.
Whatever you’ve heard about needed shutter speed from the air, double it. The closer you are to the ground the more important keeping your shutter speed high is, but frankly, I try to keep it arbitrarily high all the time. Even at 10,000 feet, flying even as slow as 200 mph means that on the ground you would have moved nearly 300 feet in one second. Those that say you can get by with shutter speeds like 1/100 in that situation are kidding themselves (are you trying to resolve things that are three feet in size? they’ll be blurry at 1/100 ;~). I see a lot of motion artifacts in edges at low shutter speeds, regardless of how high I’m flying. Couple that with any vibration that got transferred to the camera, and you have a bit of pixel mush if you look closely. Heck, why not add a diffraction-impacted aperture while your’e at it? ;~)
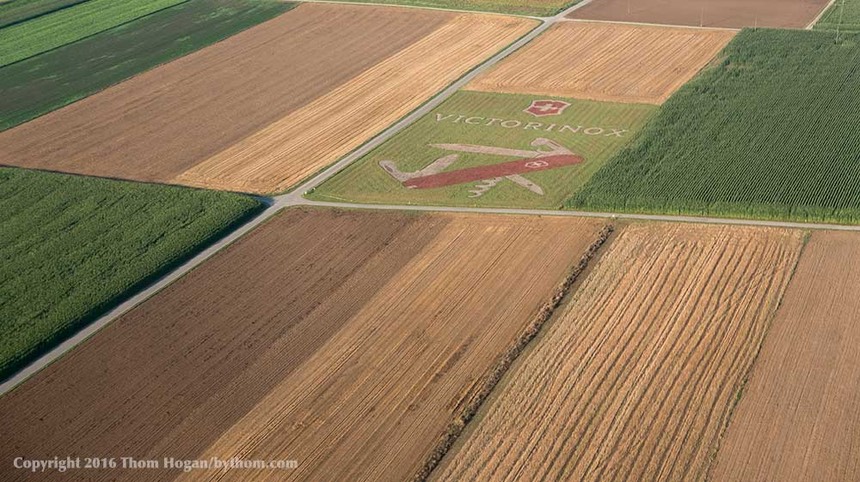
If I can hit 1/2000 without compromising anything else, that’s where you’ll find me. As we get close to the ground for landing, I want to go higher if I can. Yes, I’m probably being more persnickety than I need to about this, but I can’t tell you how often I’ve been disappointed in my shots when I let the shutter speeds drift downwards. (Hint: sometimes Photoshop’s Motion setting on the Smart Sharpen tool may help you get back some edge definition, but only sometimes.) The following shot was at 1/2000, but we’re now low enough to the ground that I’m barely holding off the left/right motion artifacts:

Even if you’ve removed all the reflections in the window you’re going to find that you still have a lot of veiling glare; the types of windows used on most planes aren't exactly as efficient at passing light directly as would be a flat pane of simple glass, and they’re often scratched or have residue from things like de-icer on them. Adobe’s Dehaze filter is going to help you here. But don’t add to the problems by putting extra glass in front of your lens (e.g. UV filter, etc.). You’ll also probably find that there’s a slight tint to the glass. So here’s a tip: while you’re still at the gate take a photo through the window of a nearby plane (most of them have white fuselages). Use that shot in your converter to figure out the exact custom white balance to use in conversion. I suspect I’ll have more to say about this later in the blog.
For some strange reason, my Panasonic LX-100 has troubles shooting out of plane windows that my Sony RX-100 doesn’t: Panasonic’s automatic white balance tends to go decidedly towards the blue-magenta side, while the Sony stays relatively neutral. I almost never use the As Shot white balance from the LX-100 to start with in Adobe’s converters, but this is compounded when shooting through airline windows.
Personally, I prefer these small, large sensor compacts to anything else for shooting from commercial airliners. You just don’t have a lot of space to juggle the big gear, and FX-sized lenses start pushing you away from the window and into awkward shooting positions. It would be nice, however, to have something more than 70/85mm equivalent at the long end, but not if it comes at the expense of losing apertures. Why? Because we’re trying to keep that shutter speed up, and we’re not always shooting in Sunny 16. Indeed, the most dramatic and interesting shots I’ve taken are almost always edge of day shots or bad weather shots.
